Navigation1

Friday, June 26, 2015

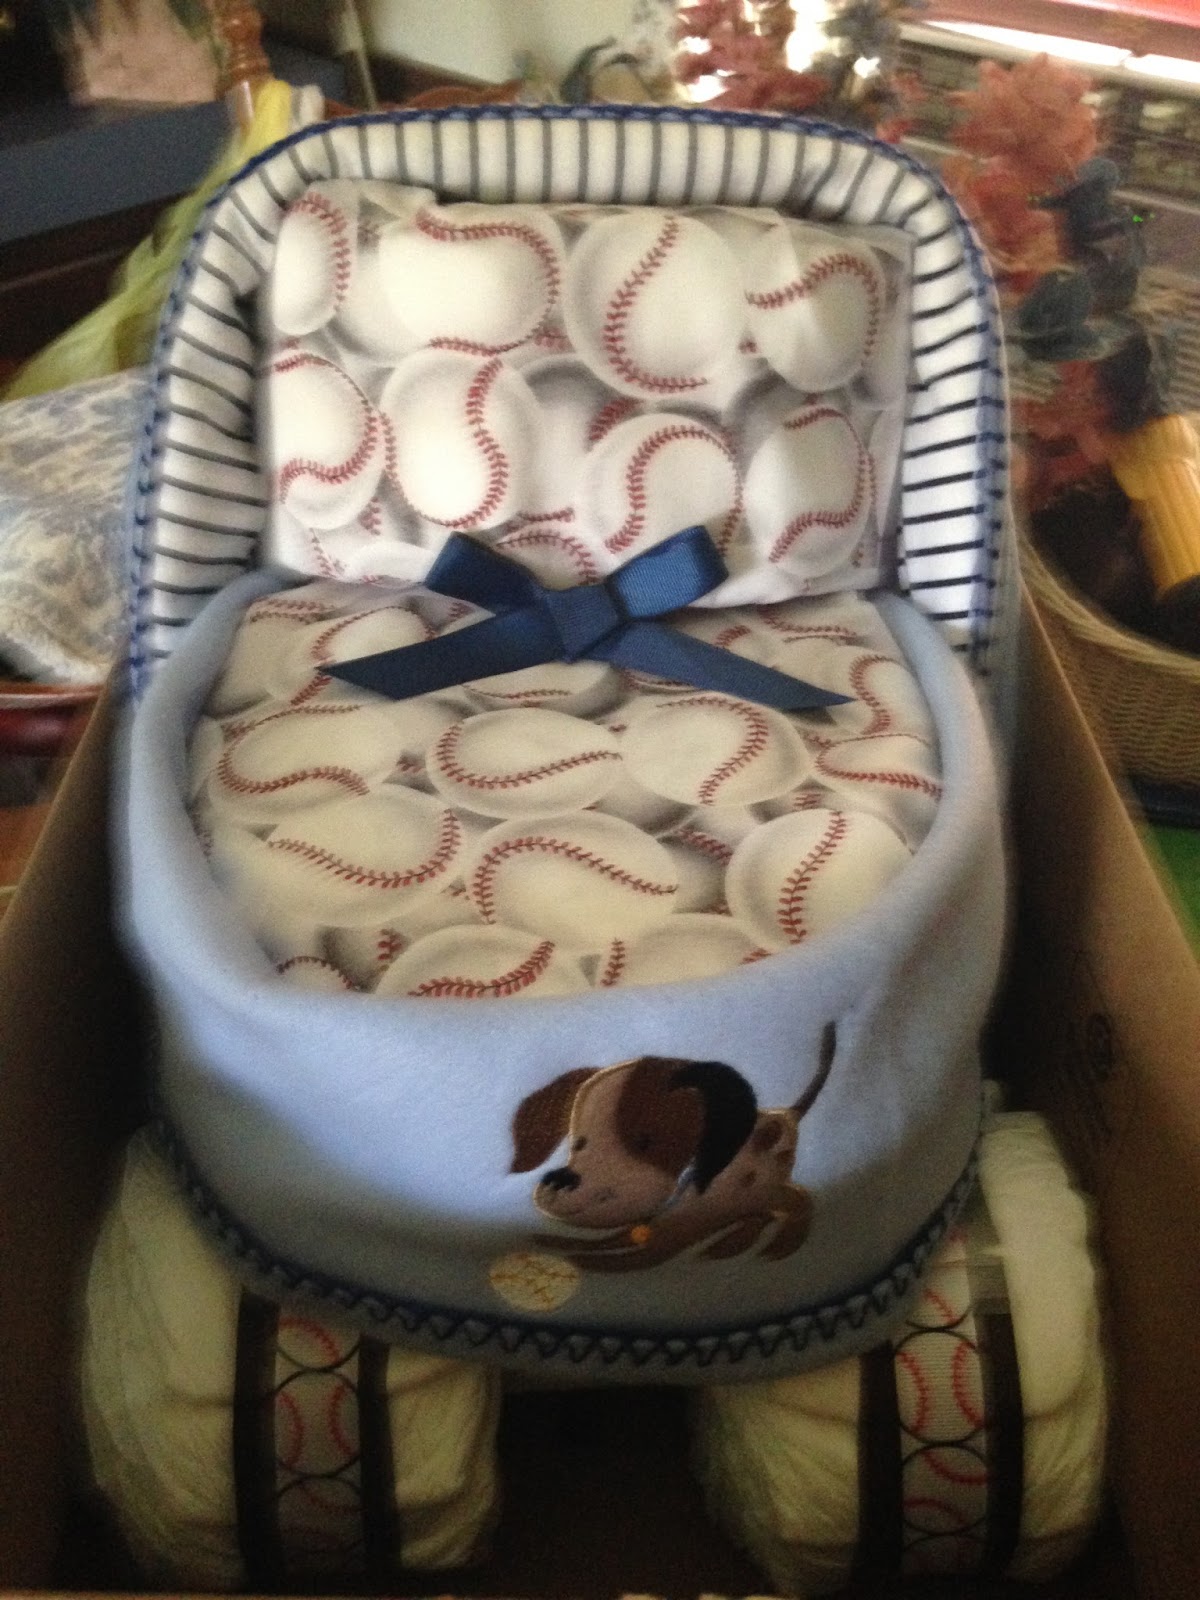
New York Yankees Diaper-Cake

When I was asked to do a Diaper-Cake with a Baseball theme, I wasn't excited!!  It's hard to find lil' boy stuff lately, especially baseball themed.

Top-it-off, they wanted New York Yankees!

I searched and searched online and couldn't find anything for a diaper-cake that was reasonably priced.


I went to almost every store in our local Mall & all the local stores that sell baby supplies.. finding NOTHING!!

Finally, I decided to look in the fabric department in our local Walmart.  I came across a cute baseball fabric that was reasonable in price that I thought might work great for this project!

Once I got it all put together, it was missing something, I thought!!  I don't normally use the same blanket on the bedding and pillow; therefore, it seemed to blend together TOO much!!  

The lady wanted New Your Yankees, but I couldn't even find a bib that had anything on it...

SO, I decided to get out my machine and cut a decal to place on the Diaper-Cake.  It turned out great and the parents could put the decal on their car or on the baby's wall... Where ever they decide really!

The final version of the New York Yankees Diaper Cake turned out amazing, I thought; and the lady who had it made and the mother were very happy in the end!!  That's all that matters in the end, right!!??  :)


Sunday, May 24, 2015

Doggie Diaper-Cake

http://diapers-galore.blogspot.com/2015/04/new-doggie-diaper-cake-to-make.html
A little while ago I told you all about the new Doggie Diaper Cake that I had to do for a little boy, and gave you a peek at the materials that I had to incorporate into the diaper-cake.

It's been completed for a few weeks, but I just hadn't posted them yet.  Sorry!

I really hated that the doggie was in the corner on this one because it is difficult to get the diaper-cake to wrap correctly, and fitting in the corner of the head of the cake is a challenge.

But... It all came together!!  :)


It turned out CUTE... as they all do!!  But I did make the decision that I'm not getting any more blankets that have the design in the corner, if I can help it!! :)

Hope you all like it, leave me some comments below!!

*Have another lil' boy one to complete this week...  Theme: Baseball (New Your Yankee's preferred if possible).  I'll share that one with you soon!


Friday, May 1, 2015

3-Tier Diaper Cake

I have a diaper-cake to make this weekend, like the stroller-looking ones I have done previously; but I wanted to try a 3-tier diaper cake... Just for FUN!  


I really liked it and did not want to take it apart.

As I look at the picture, I think of all the things that I could do to make it fabulous! (lol)

Wednesday, April 22, 2015

How to Make a Diaper-Cake


I recently made a Diaper-Cake for my child's Teacher (Extra Credit) and I promised a Step-By-Step post of how I did that; so, here it is.

When I make a Diaper-Cake I like to start with the wheels.  I'm not sure why, but I do; so, we'll get started there!  Let's Go!!


The Wheels:


Take 8-10, Size 1 Diaper's and lay them out evenly.

Either roll them into a ball on your own or use something circular like a small cake pan or something similar.


Once you have them in place, secure with a medium size rubber band. 
 It should look like this!  You will need 4. :)


Once the wheel is secure, re-adjust diapers to make the wheel look like it should.


After all 4 wheels are like you want them, you will need an axle to connect each set.  An empty Paper Towel roll will do just fine.
(You'll need 2)


Put each end of the paper towel roll in the center of the wheel, one wheel on each side..

lol It'll Look like a dumb-bell!


Each end of the axle will look plain; therefore, I like to roll 4 diapers up, secured with a small rubber band and stuff one in each hole.  Then, take 1 diaper and wrap the center of each axle.


Once you have completed the wheel, set them off to the side and get started on the Base of the Diaper-Cake!

The Base:


 Take about 30 diapers and stack them in two stacks side-by-side, interlocking the ends.

Sure with a large rubber band!

The add diapers around the outside, and try making oval.


After you have everything sure...

Wrap the base of the diaper-cake with one of your receiving blankets; and secure with a large rubber band.

I use tape to hold the under-layer after I have tucked in the ends of the blanket as best as I can.

*You can also use safety-pins if you wish, they work well too.


The Pillow:


The Pillow is pretty easy, I think.

*You'll need about 8-10 diapers depending on how pig you want it to be.

Stack them on top of each other, in the opposite direction...

I mean lay one down and then turn the other one when the top meets the bottom or the previous on... do this til you run out of your diapers.

Secure with a medium size rubber band.

After doing this add a diaper at each end of the stack to make it curve, like you see in the picture.


*Assure it is secure

Wrap the pillow with another receiving blanket.  I like to lay it center, fold in sides, and then roll the pillow until I run out of blanket.

This gives me a way to tuck under the ends and easier to secure with tape or a safety-pin; and doesn't show in the finished product.

After the pillow was completed, I sat it on the top of the Base and wrapped it with  my large fleece blanket; and secured with a large rubber band for now.

This one was different because my large blankets picture of the money was located on the corner; therefore, I used it to cover the head of the diaper-cake as well.. which is totally different than what I have done previously.

Then I sat the base on top of my wheels to get a picture of what I was working with... Which didn't look too bad.  :)


Now it's time to spruce it up with ribbons and bows and secure the base to the wheels.... 


I added a sticky tape around each wheel and a ribbon boarder around the front and sides up to the head of the diaper-cake.

However, it still appeared plain in some way....


Because in this case, I knew the baby's name, I used my machine to cut his name in vinyl letters and add to the front of the diaper-cake.

The mom can use these letters on his crib, the wall, or where-ever she chooses. :)

I also added a matching ribbon on the wheel axles.

I could have also added a bow (like I did on another diaper-cake, shown in the other picture) or something else to decorate it.


To finish it off, I added a cute monkey paci I found, which worked perfectly, I thought!!


Love It!!


*If you have any questions or comments.. Please, leave them below!!


New Doggie Diaper Cake to Make

I have a new Diaper-Cake to make this week and just got the items I need.  The color combo and theme looks great and I think this one is going to be awesome... I can't wait to get started!!!

The puppy on the blanket matches the one on the receiving blanket perfectly!!!  Just wanted to share a sneak peek! :)


Looking forward to sharing the process and completed diaper-cake with you all real soon!!

Tuesday, April 21, 2015

Extra Credit?


Yesterday, out of the blue, I decided to make my daughter's teacher a Diaper-Cake.  I had thought bout it a few times; and wanted to do a 3 tier cake version for her. but deciding at the last minute made me grab what I knew I needed instead of getting a list of items and returning to the store later.

Bad thing about the spur-of-the-moment decision is that I had to work with what the Dollar General had; and that was limited for a little boy!  I grabbed the only fleece blanket left on the shelf and the last set of receiving blankets as well.. the design patterns didn't particularly fit what I wanted; but it turned out well considering (I think so at least, and she seemed to as well).

My oldest came home and seen it and asked "Who is that for?"; and when I said who, this was the response I got.. "That's Extra Credit right there. lol"


 This one was a little bit of a challenge since I wanted to add the baby's name and the money was on the corner of the fleece blanket...  But after many changes it worked out!

The name I cut with my Cricut Expression in Vinyl letters where she can use them on his wall, crib, or a sweet picture frame.

I took a lot of photographs while I was making this diaper-cake, and plan to use them in another post that will detail how to make one for your next baby shower; so, come back and check it out in the next couple of days!

Thursday, October 2, 2014

How to Make Diaper-Cake Wheels

Depending how how big your Diaper-Cake is, may determine how many diapers you will need.  I usually use 10 for each wheel.. *40 Diapers total.

  1. Take 8-10 Diapers and stack them on top of each other, then slightly slide them a little bit apart, and roll.  ((OR))  Take a small cake pan and wrap them around it.  *Add a large rubber-band to hold them in place.
  2. Arrange the diapers as needed.


3. After you have two (2) wheels completed put your axle (paper towel center) in.  
      *You may have to adjust the diapers a little to make them perfect after doing this!
4. Add your Ribbon!

These wheels turned out amazingly.. I thought!  The diapers had a bubble type design that flowed perfect with the color scheme of the Diaper-Cake.

~I only wish my ribbon would have had the bubbles on the brown instead of the blue (or) had bigger bubbles... 

Making the wheels were a challenge for me with the first diaper-cake, but after getting the hang of it they come together quickly!


#TIP:  Make sure you have an idea of how the wheels will connect to the base of the diaper-cake before getting started.


Hope this was informational to you; please, share your creations in the comments (or) ask questions if everything isn't clear!!